Mastering Digital Strands: A Practical Guide to the Procreate Hair Brush Set Vol. 2
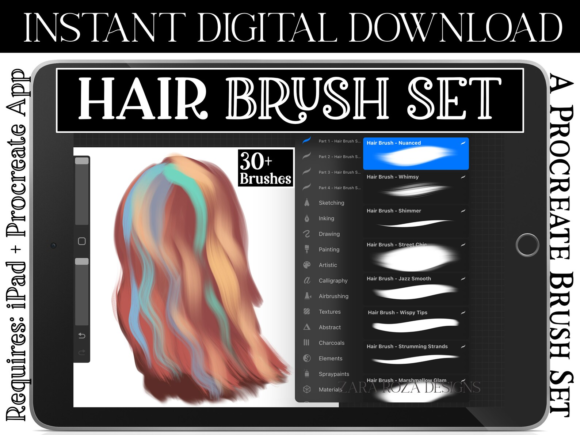
Digital portraiture has a notorious bottleneck: hair. For many artists, whether they are seasoned illustrators or hobbyists picking up an iPad for the first time, rendering realistic or stylized hair is often the most time-consuming part of the process. You can have a perfectly shaded face and expressive eyes, but if the hair looks like a solid helmet or a messy scribble, the entire piece loses its impact. This is where specialized tools become less of a luxury and more of a necessity. The Procreate Hair Brush Set Vol. 2 addresses this specific pain point by offering a curated collection of thirty brushes designed to streamline the workflow of drawing, painting, and texturing hair.
This isn’t just about adding another folder to your library; it is about reducing the friction between your creative vision and the final output. By understanding how these brushes function within the Procreate ecosystem on iPad and iPad Pro, you can significantly cut down editing time while enhancing the aesthetic quality of your character art and illustrations.
What Exactly Is in the Bundle?
Before diving into use cases, it is important to clarify what you are actually getting. The Procreate Hair Brush Set Collection Vol. 2 is not a single file but a comprehensive bundle distributed across four separate .brushset files. In total, you receive thirty distinct brushes. This organization is practical because it allows you to import only the specific categories you need at any given moment, keeping your Procreate brush library uncluttered.
It is also crucial to note the technical requirements. These tools are built exclusively for the Procreate app on iPad. They leverage the Apple Pencil’s pressure sensitivity and tilt features, meaning they will not function in desktop software like Photoshop or Clip Studio Paint. Additionally, users should be aware that the download includes a JPG file that serves merely as a thank-you card or preview; it is not a functional color palette. The actual swatches, if included, come in a .swatches file. Understanding this file structure prevents confusion during installation and ensures you are looking for the right assets to import.
Real-World Applications for Different Creators
The utility of this brush set extends beyond simple portrait painting. Different professionals and hobbyists can leverage these thirty brushes in varied ways depending on their end goals.
Freelance Illustrators and Character Designers
For freelancers working on tight deadlines, speed is currency. When creating character sheets or commission portraits, clients often request multiple hairstyle variations. Using standard round brushes to build up hair texture from scratch can take hours. With the Procreate Hair Brush Set Vol. 2, you can block in the general shape and then quickly add realistic strands and flow. This allows you to present clients with three or four different styling options in the time it would usually take to finalize one. The ability to experiment with textures rapidly means you can iterate on designs without the fear of "ruining" the base sketch.
Digital Marketers and Content Creators
Social media content relies heavily on eye-catching visuals. Bloggers and marketers who create their own graphics for Instagram stories, Pinterest pins, or blog headers often need unique, stylized avatars or illustrations. These brushes allow non-traditional artists to achieve a polished look without needing years of classical training. For instance, a lifestyle blogger might use these tools to create custom header images that feature illustrated versions of themselves, complete with accurate hair textures that match their personal brand aesthetic. The variety in the bundle supports both realistic and semi-stylized approaches, making it versatile for different brand voices.
Educators and Workshop Leaders
Art teachers and online course creators often struggle to demonstrate complex techniques like hair rendering in a way that is easy for students to replicate. By using a dedicated brush set, educators can focus their lessons on anatomy, light, and shadow rather than spending twenty minutes showing how to manually paint individual hairs. It serves as a scaffolding tool, allowing students to achieve satisfying results early in their learning journey, which boosts confidence and retention. The clear separation of the four .brushset files also makes it easier for teachers to assign specific exercises, such as "use only the curly hair brushes from Set 3 for today's practice."
Why Texture and Flow Matter in Digital Art
Hair is rarely static. It reacts to gravity, wind, and movement. One of the primary benefits of using a specialized set like Procreate Hair Brush Set Vol. 2 is the inherent variation in the brush tips. Standard brushes often produce uniform strokes, which can make digital hair look artificial and plastic. These custom brushes introduce organic irregularities that mimic the clumping and thinning of real hair strands.
When you are working on an iPad Pro, the high refresh rate and low latency allow these brushes to feel responsive. You can switch from broad, sweeping strokes for the overall silhouette to fine, detailed lines for flyaways and highlights. This dynamic range is essential for creating depth. Without it, hair tends to look flat, lacking the volume that comes from layered textures. The thirty brushes included provide a spectrum of densities, allowing you to build up opacity gradually rather than committing to a heavy, opaque line immediately.
Considerations Before You Start
While these tools are powerful, they are not magic wands. There are several factors users should consider before integrating them into their workflow.
- Learning Curve: Even with specialized brushes, you need to understand the underlying structure of hair. Brushes help with texture, but you still need to map out the form. Spend time studying how hair grows from the scalp and how it falls over the shoulders.
- Device Compatibility: As mentioned, this requires the Procreate app on an iPad. If you are using an older iPad model with limited processing power, running multiple high-resolution layers with complex brushes might slow down your canvas. Ensure your device is optimized for heavy digital painting tasks.
- Style Matching: Not every brush will suit every art style. If you are creating minimalist line art, some of the textured painting brushes might be too noisy. It is worth testing each of the thirty brushes on a sample canvas to determine which ones align with your specific aesthetic.
- File Management: Since the bundle comes in four separate
.brushsetfiles, take a moment to organize them. Rename folders or group them logically within Procreate so you aren’t scrolling through hundreds of tools when you need a specific hair texture quickly.
Integrating the Brushes into Your Workflow
To get the most out of the Procreate Hair Brush Set Collection Vol. 2, start with a solid underpainting. Use a basic soft brush to establish the light and shadow shapes of the hair mass. Once the values are correct, begin layering the specialized brushes. Start with the broader strokes to define the main direction of the hair flow. Then, move to the finer brushes to add definition and stray hairs.
Experimentation is key. Try combining different brushes from the four sets. You might find that a brush from the first set works best for the roots, while a brush from the fourth set creates better highlights at the tips. The goal is to create a seamless blend that looks intentional, not stamped on. Remember, the JPG file included is just a preview; rely on the actual .brushset imports to do the work.
Ultimately, the value of this collection lies in its ability to remove technical barriers. By handling the intricate details of strand texture, these brushes free you to focus on composition, color theory, and expression. Whether you are designing a character for a game, illustrating a children's book, or simply enjoying the therapeutic process of digital painting on your iPad, having the right tools makes the difference between a frustrating session and a fulfilling creative experience. Happy drawing.