Unlocking Digital Creativity: A Complete Guide to the Procreate Mobia Brush by Zmapist
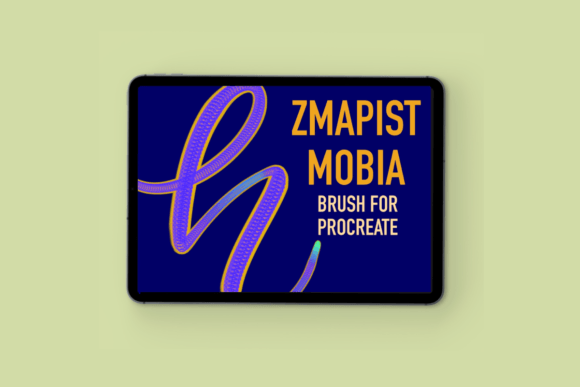
In the rapidly evolving landscape of digital art, tools are no longer just utilities; they are extensions of the artist’s imagination. For iPad users, Procreate has become the industry standard, offering a canvas that feels as natural as paper but with the infinite possibilities of digital media. However, the true magic of Procreate lies in its customizability, specifically through third-party brushes. Among the myriad of options available, the Procreate Brush - Mobia Zmapist stands out as a unique tool designed to elevate texture and depth in digital illustrations. This article explores the significance of this specific brush set, guides you through the installation process, and discusses how integrating specialized tools like the Mobia Brush can transform your creative workflow.
The Significance of Custom Brushes in Modern Digital Art
Before diving into the specifics of the Mobia Brush, it is essential to understand why custom brushes matter. While Procreate comes with a robust library of default brushes, professional artists and hobbyists alike often seek tools that offer distinct characteristics. Standard brushes are versatile, but they can sometimes lack the organic imperfections or specific textural qualities found in traditional media.
Custom brushes, such as those created by Akanksha S Rawat under the brand Zmapist, bridge this gap. They are engineered to mimic real-world materials or create stylized effects that are difficult to achieve manually. The Procreate Mobia Brush is not merely a stamp; it is a dynamic tool that responds to pressure, tilt, and speed, allowing for a level of expression that mirrors physical painting. In modern creative workflows, whether for concept art, illustration, or graphic design, having access to high-quality, specialized brushes can significantly reduce production time while enhancing the visual impact of the final piece.
Understanding the Mobia Zmapist Aesthetic
The Mobia Brush is part of a curated collection that emphasizes texture and atmospheric depth. When artists talk about "texture" in digital art, they refer to the surface quality of the artwork—how rough, smooth, grainy, or fluid it appears. The Mobia Brush is designed to introduce a tactile sense to digital canvases. It is particularly effective for:
- Backgrounds and Landscapes: Creating organic, non-repetitive patterns that suggest foliage, stone, or weathered surfaces.
- Character Design: Adding subtle grit or fabric textures to clothing and skin tones.
- Abstract Art: Generating complex layers that add visual interest without overwhelming the composition.
By using the Procreate Brush - Mobia Zmapist, artists can move beyond flat colors and clean lines, introducing a sense of history and materiality to their work. This aligns with a broader trend in digital art where the goal is often to make the digital look analog, preserving the human touch in a computer-generated medium.
Step-by-Step Guide: How to Install the Procreate Mobia Brush
Acquiring a new brush is only the first step; installing it correctly ensures it functions as intended. Many beginners find the file management aspect of iPadOS slightly confusing, especially when dealing with compressed files. The Procreate Mobia Brush is delivered in a ZIP file, which is a compressed archive containing the brush data. Here is a comprehensive guide to getting your brush ready for use.
Method 1: Using a File Management App
If you are unfamiliar with iOS file handling, using a dedicated app can simplify the process. Apps like FileExplorer File Manager or iZip are excellent free tools for managing compressed files.
- Download the ZIP File: Ensure you have saved the Mobia Brush ZIP file to your iPad’s "Files" app or within your chosen file manager.
- Unzip the File: Open your file management app (e.g., iZip). Locate the downloaded ZIP file and tap on it to extract the contents. You should see a single file with the extension
.brushor.brushset. - Open in Procreate: Tap on the extracted brush file. Select "Share" or "Open In," and choose Procreate from the list of apps. The brush should automatically import into your Procreate library.
Method 2: Direct Import via Procreate
If you prefer not to use third-party apps, or if the "Open In" option does not appear, you can import the brush directly through the Procreate interface. This method is reliable and keeps your workflow within a single application.
- Prepare the File: Ensure the ZIP file is unzipped. If you are using the native iOS "Files" app, you can often unzip files by simply tapping on them. Ensure you have the standalone
.brushfile accessible in your Files app. - Open Procreate: Launch the Procreate app and open a new canvas. The specific canvas size does not matter for installation.
- Access the Brushes Panel: Tap the paintbrush icon in the top left corner to open the Brushes panel.
- Initiate Import: Look for the small button located above the list of brush sets on the left side. It typically looks like a square with a downward arrow or a plus sign, depending on your version. Tap this button to select Import.
- Locate the Brush: A file browser window will appear. Navigate to the folder where you stored the unzipped Mobia Brush file.
- Finalize Installation: Tap on the brush file. Procreate will process the file, and it will immediately load into your current brush set. You can now drag and drop it into a preferred folder for easy access.
Note: Always ensure your Procreate app is updated to the latest version to guarantee compatibility with newer brush formats.
Integrating the Mobia Brush into Your Creative Workflow
Once installed, the real work begins. Integrating a new tool like the Procreate Mobia Brush requires experimentation. It is not enough to simply select the brush; one must understand its behavior. Start by adjusting the opacity and flow settings. For the Mobia Brush, lower opacity often yields better results, allowing you to build up texture gradually rather than applying it heavily in a single stroke.
Consider the context of your project. If you are working on a digital painting, use the Mobia Brush on a separate layer set to "Multiply" or "Overlay" blending modes. This technique allows the texture to interact with the colors beneath it, creating a more cohesive and integrated look. For graphic designers, this brush can be used to add a vintage or distressed effect to typography and logos, adding a layer of sophistication and uniqueness to brand identities.
Common Misunderstandings About Digital Brushes
A common assumption among beginners is that a high-quality brush will automatically make a drawing look professional. This is a misconception. Tools like the Zmapist brushes are enhancers, not replacements for fundamental skills. Understanding anatomy, color theory, and composition remains paramount. The Mobia Brush provides the texture, but the artist provides the vision. Furthermore, some users believe that more brushes equal better art. In reality, mastering a few versatile brushes, such as the Mobia, is far more effective than hoarding hundreds of unused presets.
Conclusion: Elevating Your Art with Zmapist
The Procreate Brush - Mobia Zmapist represents more than just a digital asset; it is an invitation to explore texture and depth in your artwork. By understanding how to install and effectively utilize this tool, you expand your creative vocabulary. Whether you are a student learning the ropes of digital illustration or a seasoned professional looking to refine your toolkit, the Mobia Brush offers a tangible way to enhance your projects.
Digital art is a community-driven field, and sharing your progress is a vital part of growth. Akanksha S Rawat encourages users to share their creations. If you create something using the Procreate Mobia Brush, consider tagging @zmapist on Instagram. Engaging with the creator and the broader community can provide feedback, inspiration, and a sense of connection. As you continue to experiment, remember that every stroke is a step toward mastering your craft. Happy creating!
xoxo, Akanksha S Rawat, Zmapist